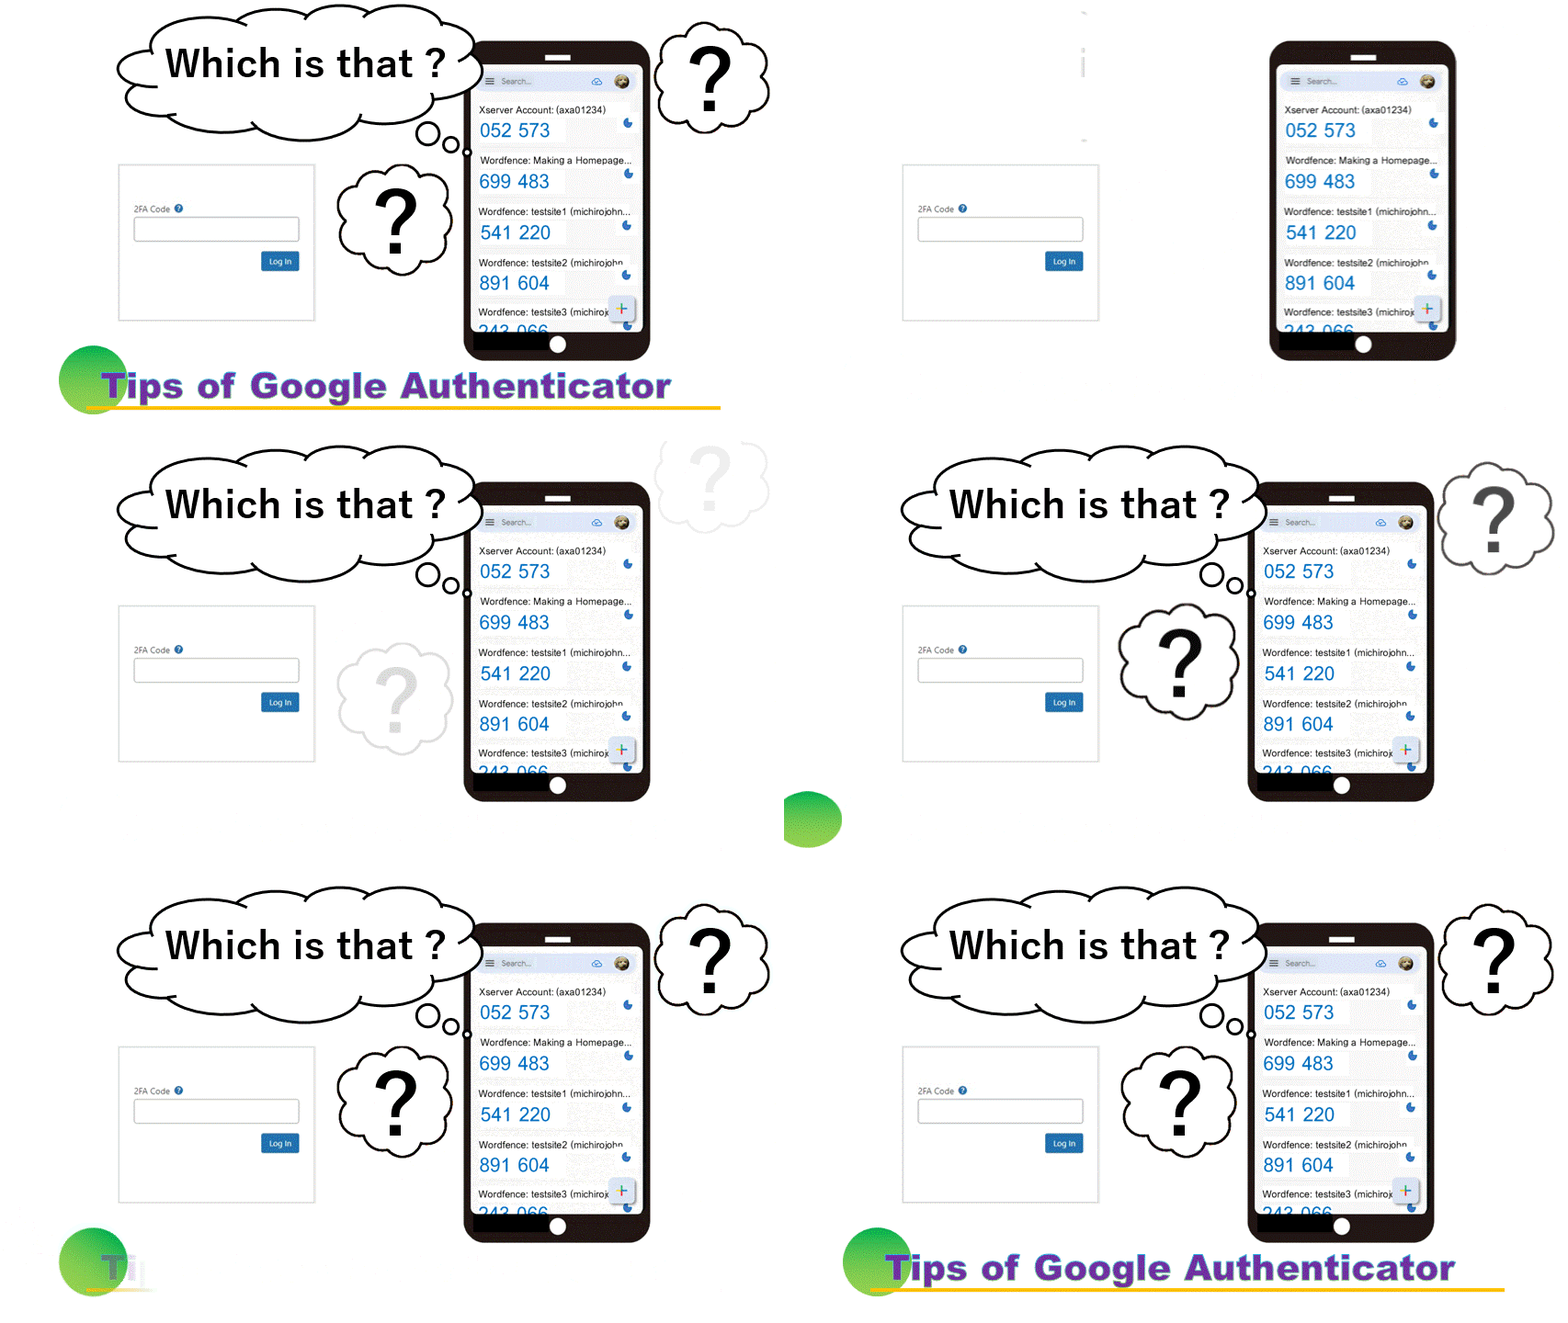
Authenticator is a strong security for two-factor authentication. But many people don’t know it well, because it’s hard to understand. You might end up just scanning the QR code. But there is a risk of failing the authentication as it is.
Here’s the usage of Google Authenticator.
Basic usage
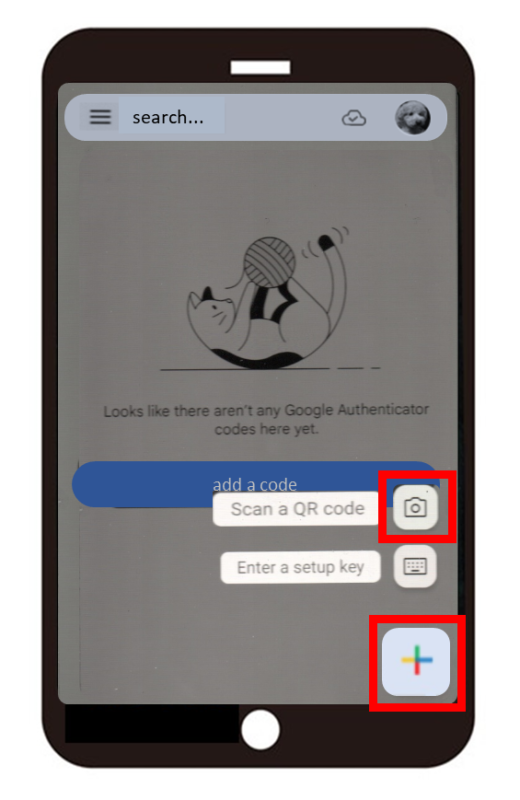
You can scan a QR code by tapping the cross key then tapping the camera icon.
If you save this QR code as an image instead of scanning it directly, two-step authentication will not fail even if you do not back it up.
The details are below.

This way works for apps which cannot back up the authentication codes.
The case you cannot scan a code
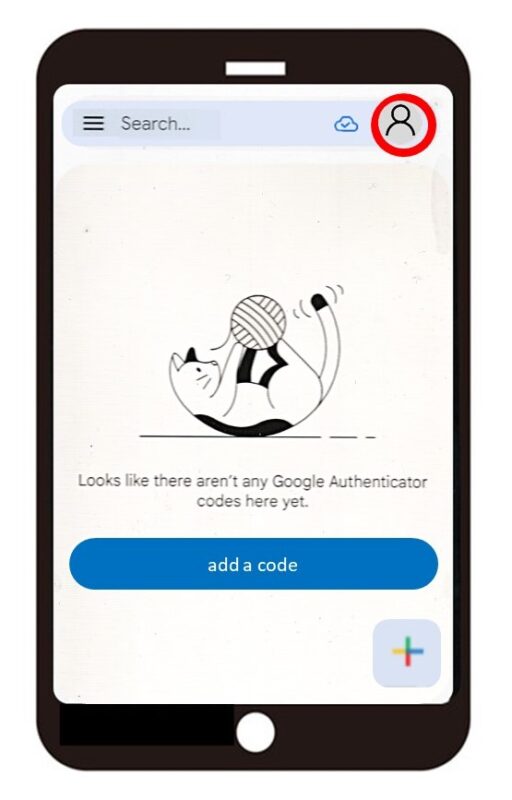
Only one set of verification codes would be backed up to Google account. You cannot get these codes, if you don’t connect to this set. Click ” ![]() ” in the upper right corner to switch the account.
” in the upper right corner to switch the account.
If you don’t have a Google account, create it.
Click or tap the banner below to create Google account.

Change the order of codes
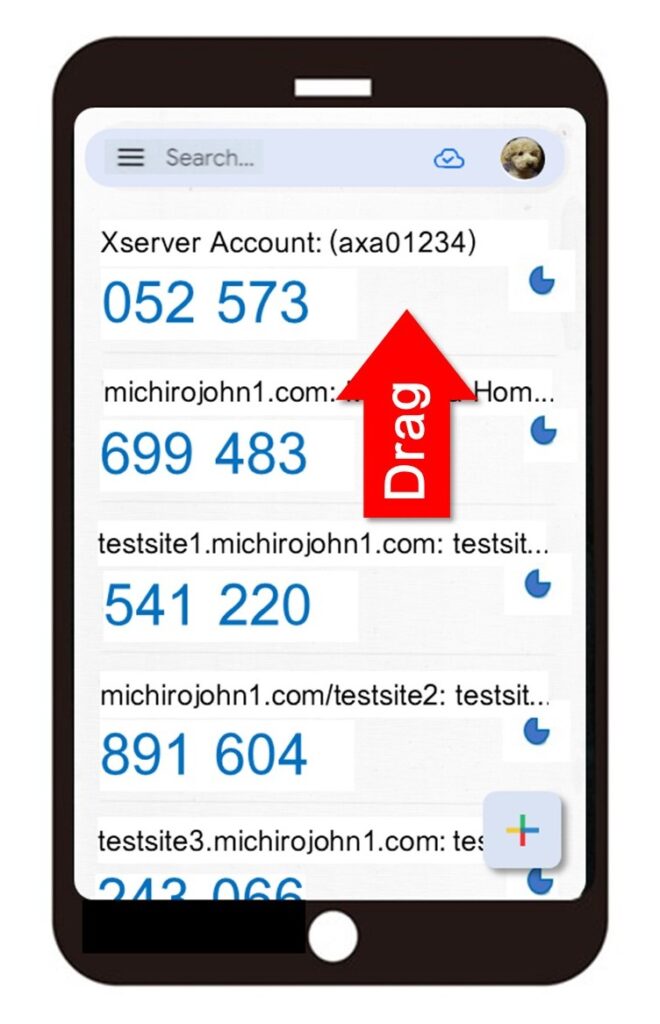
Drag the code, then you can change the order.
You will move the code using frequently to the top.
Change a code name
As there are too many codes, you cannot remember which is which.
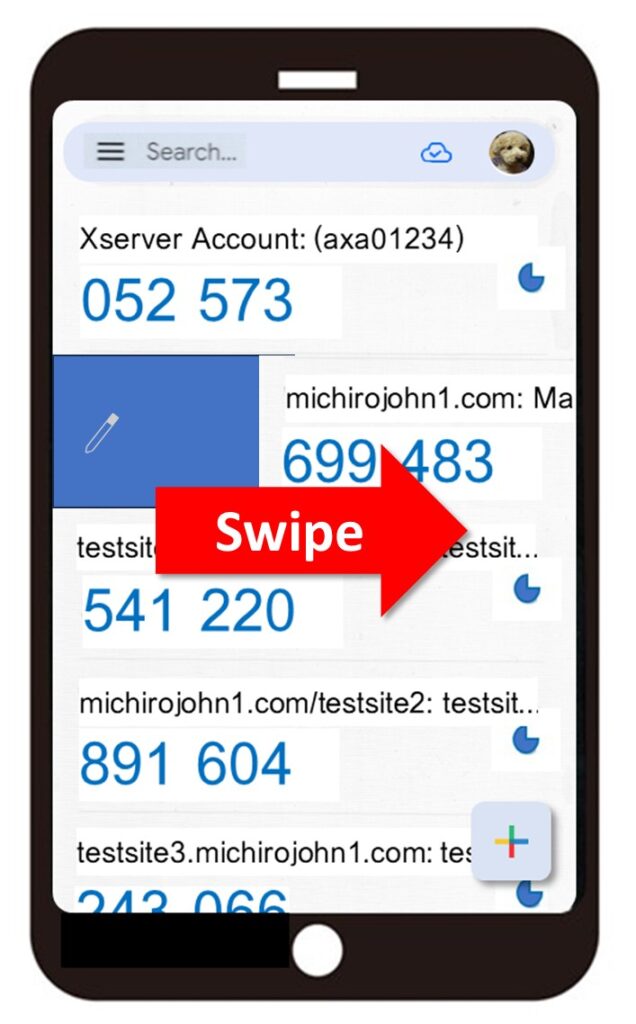
You can change a code name by swiping or flicking the code.
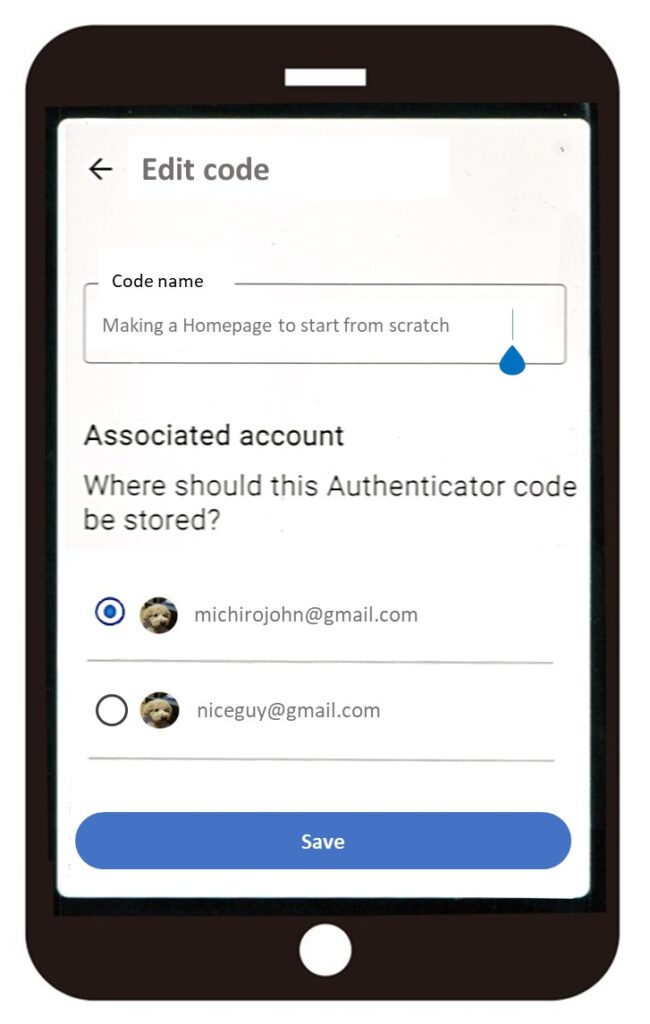
Change the name easy to remember. The changed name is displayed after a domain name. If the domain name is too long, it will be difficult to find. But if you type a character in Search, the candidates are displayed. So if you insert a character which is not used in other codes, you can find it easily.
Also, you can specify the backup destination here.
Delete a code
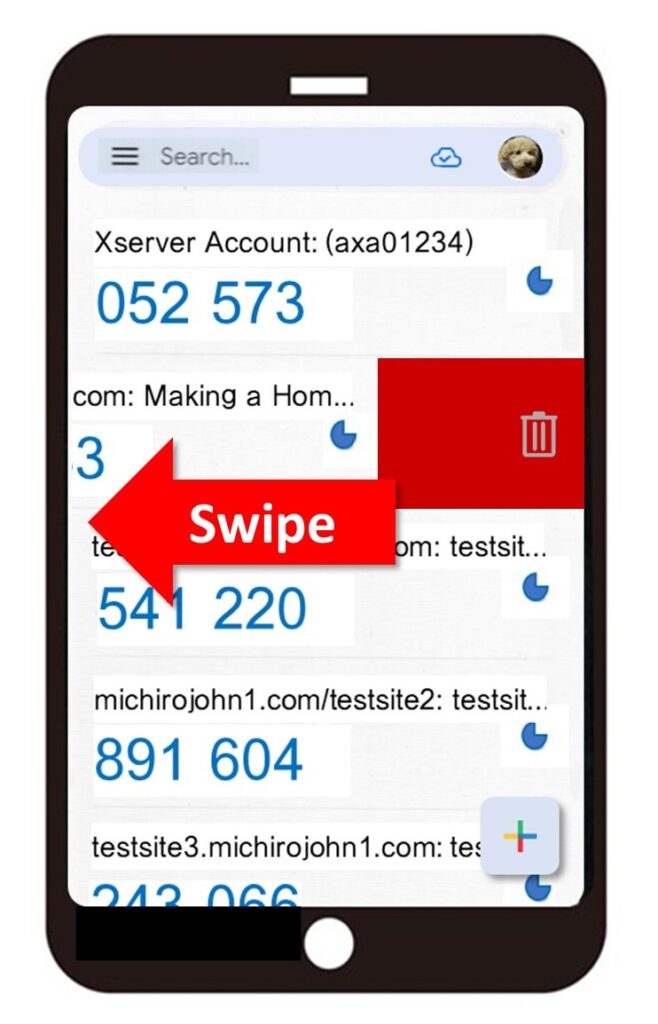
You can delete a code by swiping or flicking it to the left.
A confirmation dialog will appear. If it is okay, delete it.
Update the codes
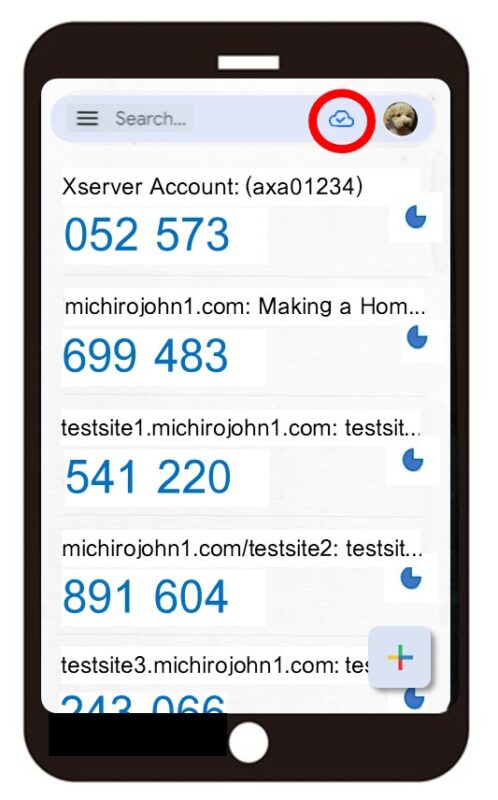
Pressing Cloud Button, you can update the codes.
When you will add a code or delete a code, press this button.
Be careful to press this backup button. If you choose other account where is not the associated account, the backup set is duplicated. There is a case to fail for 2FA by using the old set.
Thank you for reading.
If you feel this article “Like!”, click the ads below ⇩⇩
Your click makes my affiliate income. It motivates me (^^;.
If you give a tip ——
Leave a comment(コメントを残す)